Creating LVM (Logical Volume Management) on Ubuntu 22.04 allows you to efficiently manage storage resources by combining multiple disks or partitions into a single logical volume.
In this blog post, we will explore the step-by-step process of creating LVM on Ubuntu 22.04, including adding new disks, creating physical volumes, volume groups, and logical volumes. We will also cover formatting and mounting the newly created logical volumes. Let's dive in and learn how to harness the power of LVM for flexible and scalable storage management.
Environment:
Machine: Ubuntu-22.04 (on VMWare)
Add new disk to vm
-
shutdown VM
-
Click settings > Add device

Add new disk to vm -
then add new disk
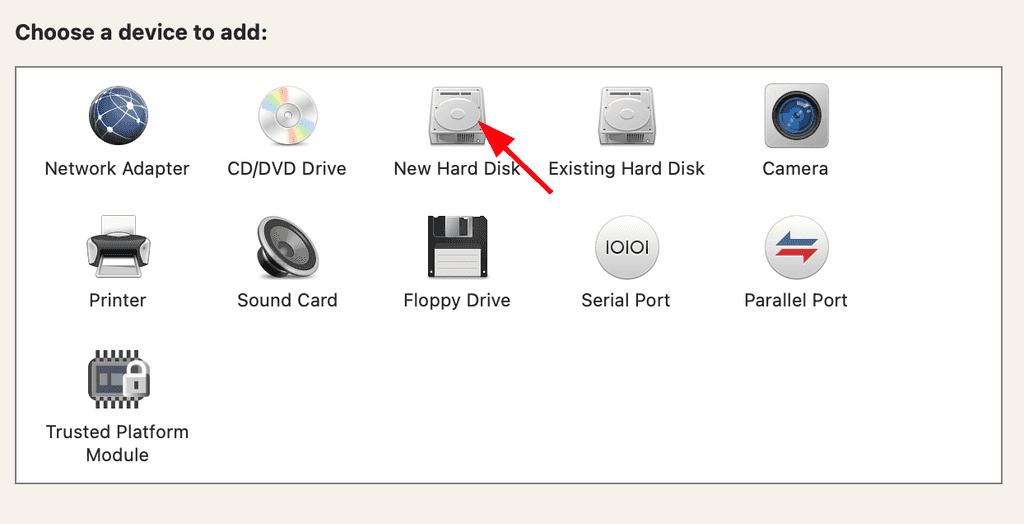
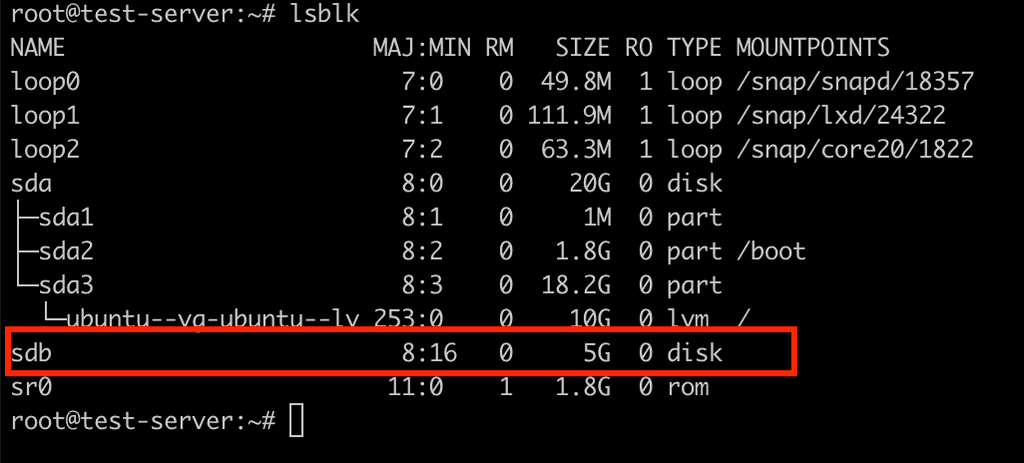
add new disk to the device Then, lsblk command will show new disk, sdb for us
Creating LVM on Ubuntu:
This shows the pictorial demonstration of creating LVM.
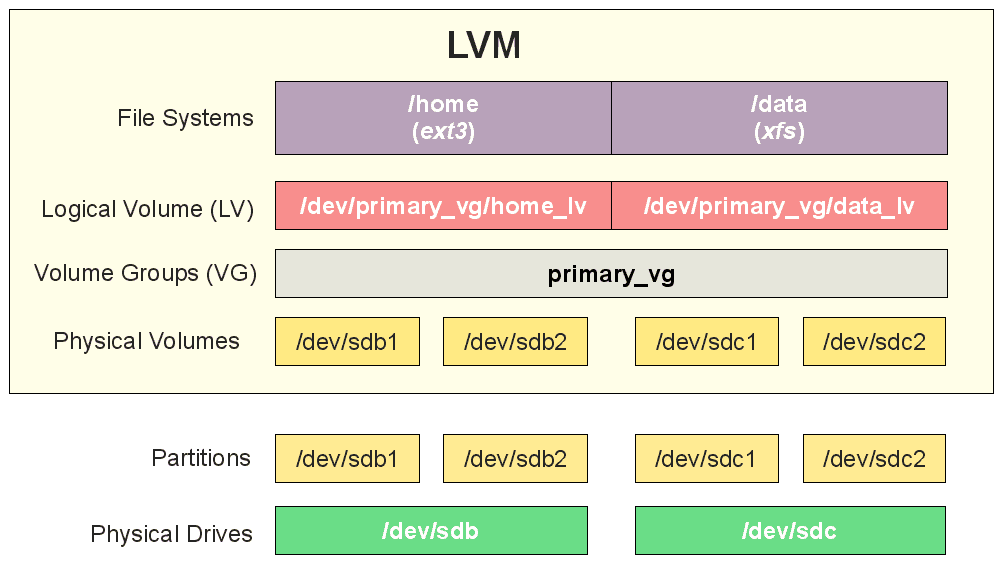
Steps in creating LVM:
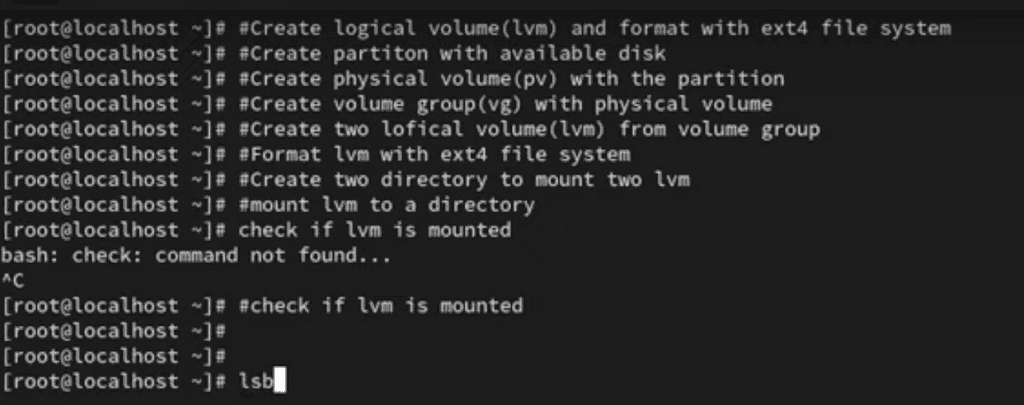
# check if disk is attached
lsblk
# See output below


# format this sdb disk with gpt
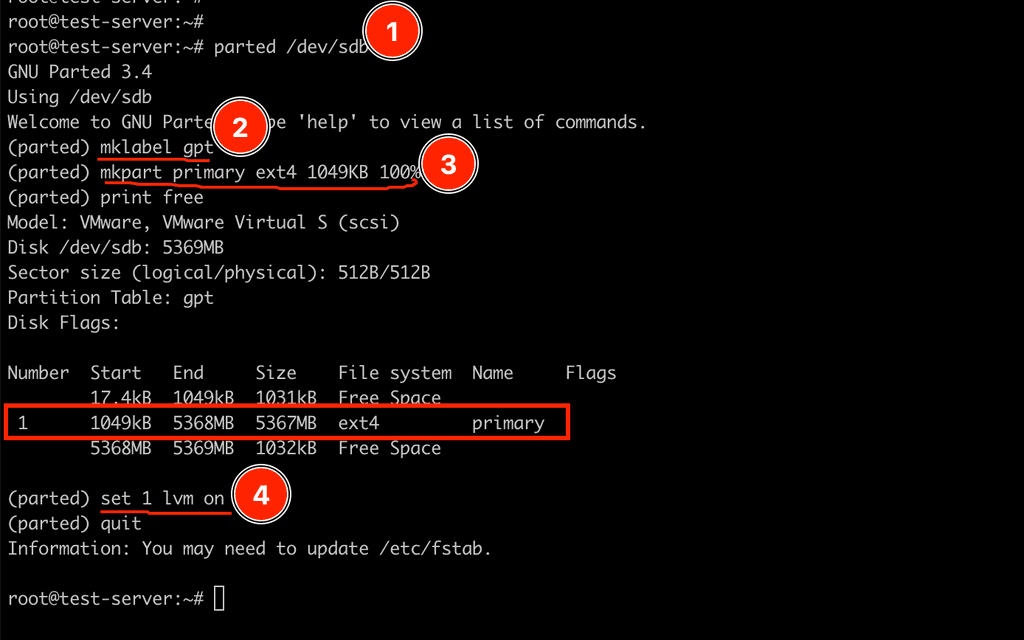
parted /dev/sdb
# this will enter us to parted interactive shell
(parted) mklabel gpt

# create a partition
(parted) mkpart primary ext4 1049KB 100%
(parted) print free
(parted) set 1 lvm on # this will set lvm on to just created ext4 partition
(parted) quit
# See output below


# check disk again, to see our created partition
lsblk
Output: lsblk
output: parted commands:
See newly created partition:
Output: lsblk
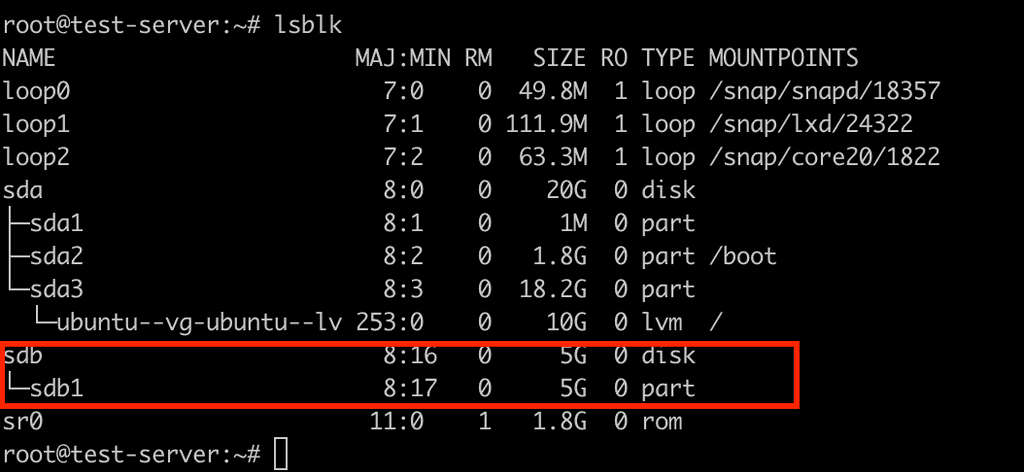
Till now, We created the partition with new disk, however, physical volume is still not created.
Create physical volume
# list physical volumes
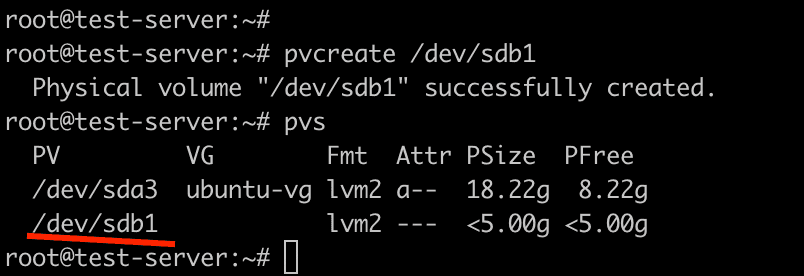
pvs

# create physical volume with our partition.
pvcreate /dev/sdb1
Output: pvs

Output after creating pv:
create volume group
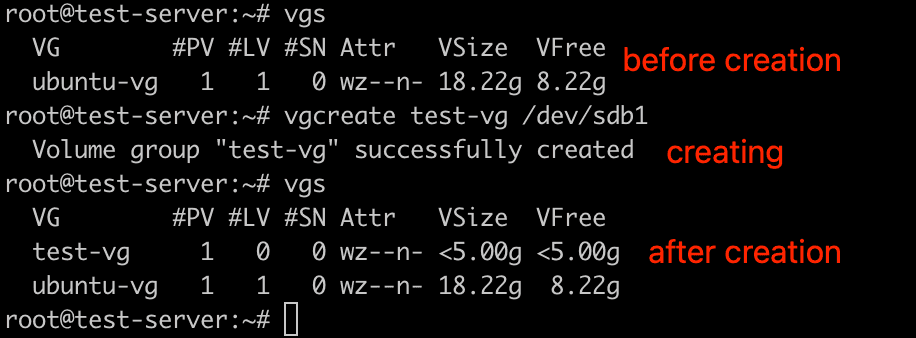
vgs

# create new volume group with our created physical volume
vgcreate <vg-name> /dev/sdb1
Output: vgs
vgcreate
create logical volume
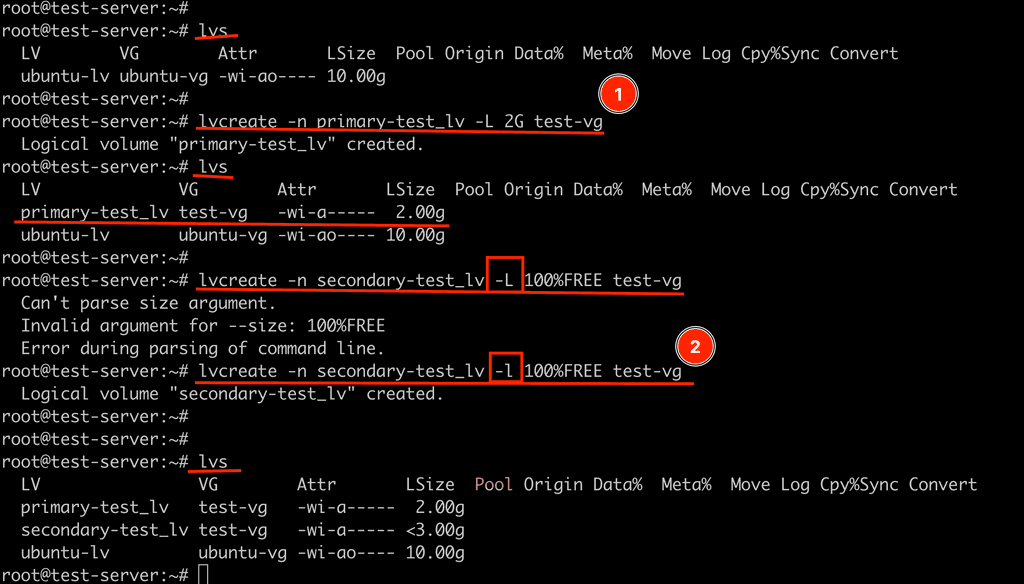
Now, we are going to create two logical volume, one with 2G and another with 3G size.
# list available logical volumes
lvs

# create new logical volume from our newly created vg
lvcreate -n <name> -L <size> <vg-name>
lvcreate -n primary-lv -L 2G test-vg

# create another lv from available memory
~~lvcreate -n secondary_lv -L 100%FREE test-vg~~

# don't know why it needs small l
lvcreate -n secondary_lv -l 100%FREE test-vg

lvsCaution:
-l : is for specifying extent, like 50%, or 7 extent.
-L : to extend the logical volume by specifying a specific size in units like bytes, kilobytes, megabytes, gigabytes, etc
format both lvm with ext4
mkfs.ext4 /dev/test-vg/primary-test_lv

mkfs.ext4 /dev/test-vg/secondary-test_lv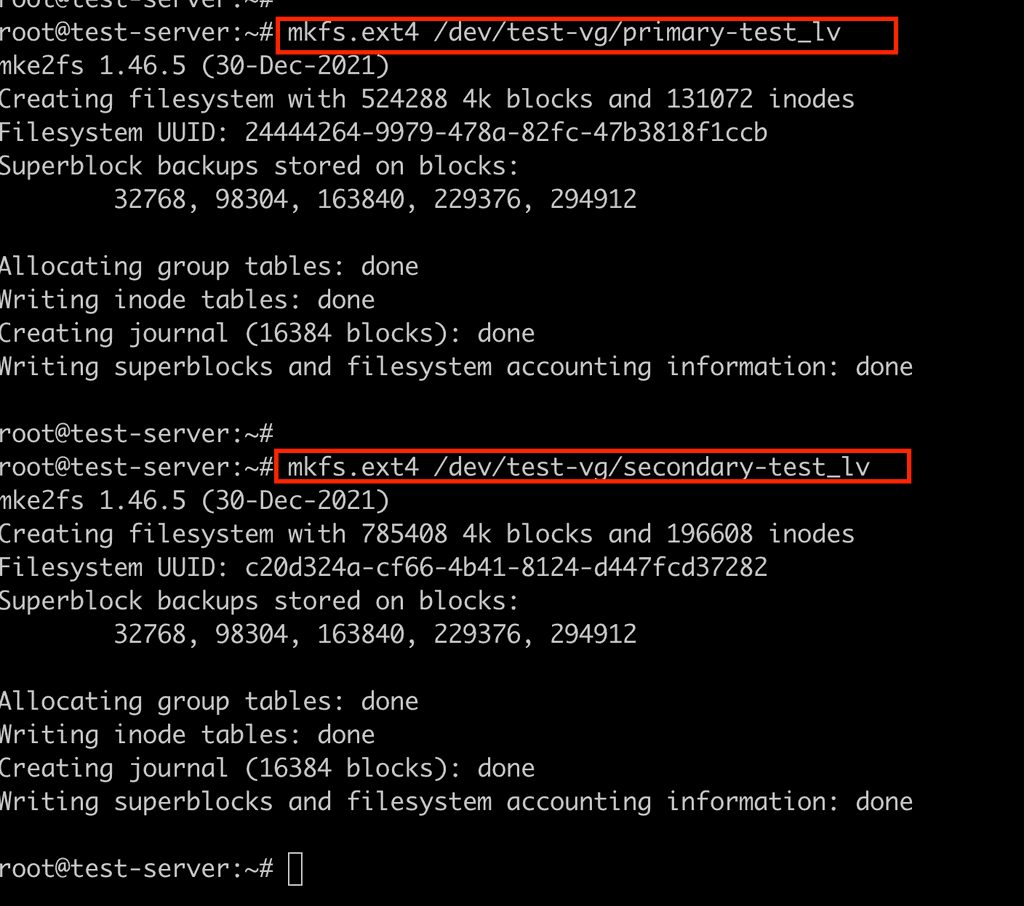
mount created lvm
# create two directory to mount
mkdir /test-primary_storage
mkdir /test-secondary_storage

# check initial mounted file systems
df -hT

# mount created lv with mount point
mount <device> <mount-point>
mount /dev/test-vg/primary-test_lv /test-primary_storage
mount /dev/test-vg/secondary-test_lv /test-secondary_storage

# check if our mount is successfull
df -hT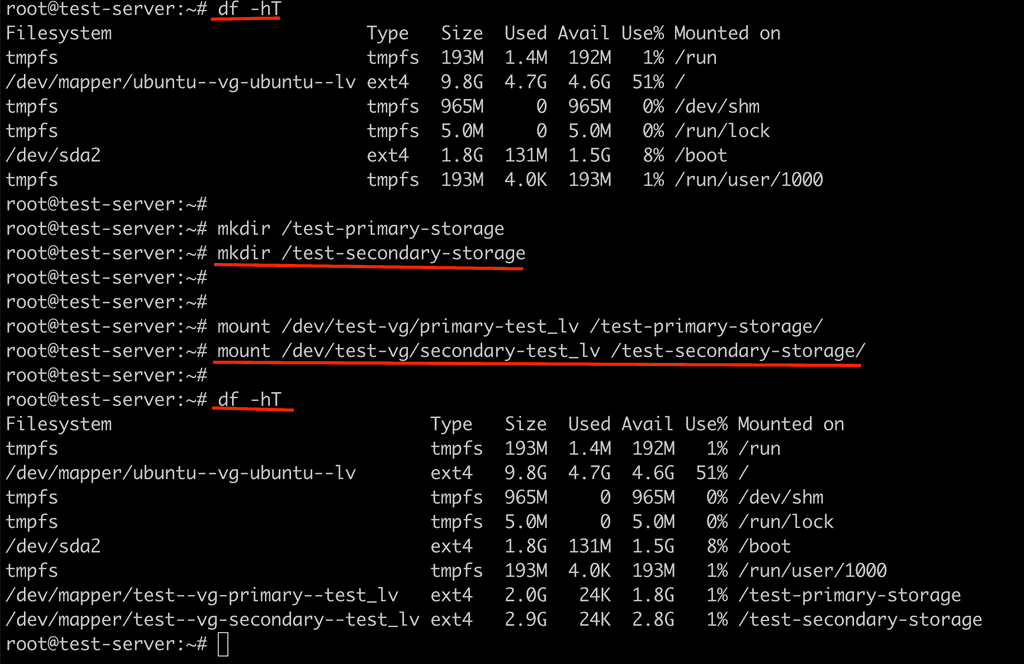
Still, this is not persistently saved. If we now reboot our system, these changes will not be reflected. For this to be implemented persistently, we need to make it persistent.
We will learn how to make this lvm persistent on our another article here.
